★★★★★"Finally got my info off those creepy people search sites. ZeroPrivacy made it easy!"Sarah K.
★★★★★"Tried doing opt-outs myself... what a nightmare. This service saved me hours."Mike P.
★★★★★"Feeling much safer online knowing my data isn't being sold anymore. Highly recommend!"Jessica L.
★★★★★"Found my details on sites I'd never even heard of. ZeroPrivacy removed them all."David R.
★★★★★"Impressed with how quickly ZeroPrivacy handled my removal requests. A+ service."Emily R.
★★★★★"Worth every penny for the peace of mind. So much data was out there!"Alex T.
★★★★★"Finally got my info off those creepy people search sites. ZeroPrivacy made it easy!"Sarah K.
★★★★★"Tried doing opt-outs myself... what a nightmare. This service saved me hours."Mike P.
★★★★★"Feeling much safer online knowing my data isn't being sold anymore. Highly recommend!"Jessica L.
★★★★★"Found my details on sites I'd never even heard of. ZeroPrivacy removed them all."David R.
★★★★★"Impressed with how quickly ZeroPrivacy handled my removal requests. A+ service."Emily R.
★★★★★"Worth every penny for the peace of mind. So much data was out there!"Alex T.

Identity protection starts here

Instant Checkmate Opt Out: Remove Your Personal Information

Instant Checkmate may publish personal details that make you easier to find. Follow the manual removal guide below, or use ZeroPrivacy to scan data brokers and monitor for records that return.

US Flag+1
Free Scan | No Sign-up Required
By providing your number and requesting a number risk scan below, you agree to receive a one-time message from Zeroprivacy with your scan results. You confirm that the phone number belongs to you, and consent to receive a verification code. Subject to Terms of Service, Prohibited Use Policy, and Privacy Policy.

ZeroPrivacy:

Does not store, sell, or share your personal data
Is SOC 2 compliant and uses end-to-end encryption
Only processes your information to deliver results securely
View our full privacy policy

Disclaimer: You agree not to use any aspect of the ZeroPrivacy Services for FCRA purposes.

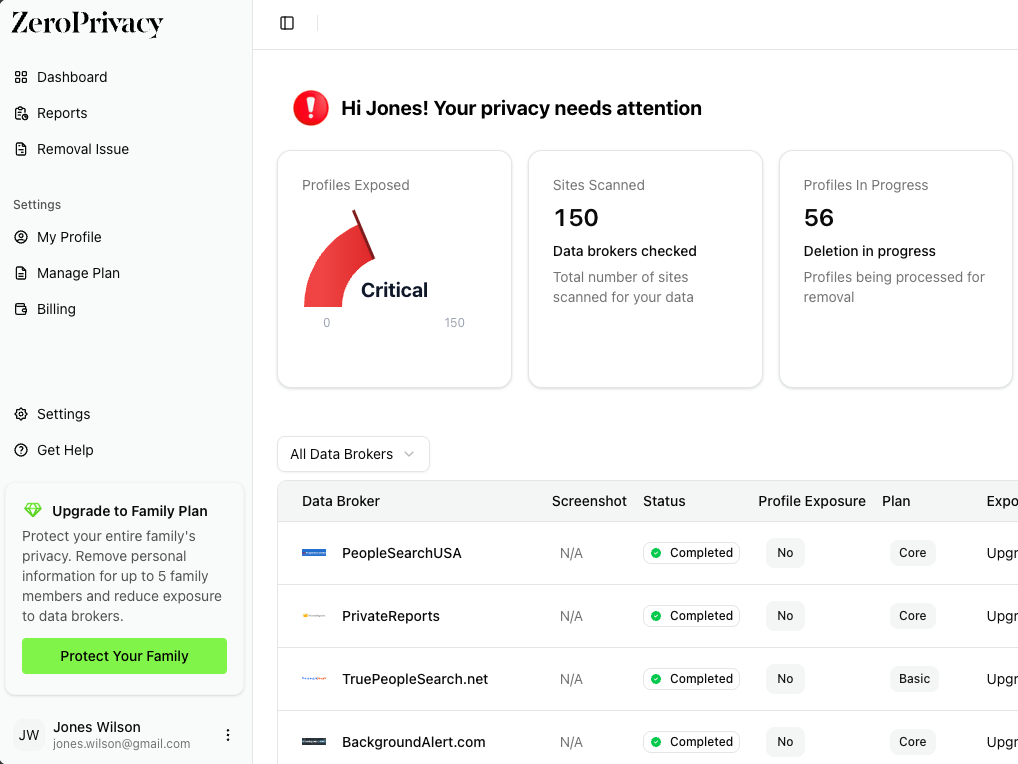
Profile information cards showing data broker exposure like Instant Checkmate

Step-by-step privacy guide

How to opt out of Instant Checkmate

Instant Checkmate routes public-record suppression through PeopleConnect. The request is not complete when the email is verified: you must also match a record, verify a contact method from that record, and save its Desired Behavior as Suppressed.

Time needed
About 10–15 minutes
Cost
Free
Website
InstantCheckmate.com
Have ready
An inbox, date of birth, and one listed email or phone

Step 1

Open the Instant Checkmate privacy route

Start from the broker’s privacy page or go directly to the suppression tool.

Open the Instant Checkmate privacy page and look for Suppression Request, Manage My Suppression Rules, or a similarly named public-data tool.

The destination should be the PeopleConnect Suppression Center. No paid background report or subscription is required.

Step 2

Enter an email address you can open now

PeopleConnect emails a link before it displays the identity form.

Enter a working inbox, review the linked terms, select the consent checkbox, and choose Continue.

Leave the browser tab open. A separate email alias is suitable for this first screen because it is being used to enter the tool.

Check: If the message does not arrive, check spam and request one new email. Use the newest link rather than opening several verification messages.

Step 3

Open the PeopleConnect email link

The link returns you to the suppression workflow.

Open the message from PeopleConnect and follow its verification link. Confirm that the destination belongs to peopleconnect.us before continuing.

Continue in the same browser when possible. The next screen should ask for identity details, not payment information.

Step 4

Enter your date of birth

The date is used to separate records belonging to people with similar names.

Enter the full date exactly, review it for transposed numbers, and select the acknowledgement shown by the form.

Choose Continue only after checking the date. The current workflow warns that it cannot be changed once saved.

Check: A wrong date can hide the correct result or prevent verification later in the process.

Step 5

Add your current and former names

Use only names that could genuinely be attached to your public records.

Enter your current legal name and mark it as your legal name on the form.

Add a maiden name, former legal name, or established variation if records may exist under it. Unrelated variations make the result list less useful.

Step 6

Select the matching Instant Checkmate record

Compare more than the name before choosing a result.

Review the birth-date range, locations, phone numbers, and email addresses displayed with each match.

Select the record that lines up with your history and choose Continue. If two results both belong to you, finish one and return for the other.

Check: If nothing matches, go back and check the birth date and name entries. Never choose someone else’s record because the name looks close.

Step 7

Verify a contact method shown on the record

This second check proves that the selected report belongs to you.

Choose a masked phone number or email address that you recognize and can still access. Enter the full value and request a code.

Enter the code sent to that phone or inbox. Once the record is marked verified, choose Continue.

Check: If none of the listed contact methods is accessible, do not enter a substitute. Contact PeopleConnect privacy support with the record ID.

Step 8

Set Desired Behavior to Suppressed

Passing verification does not automatically hide the report.

On the Control screen, open the Desired Behavior menu and select Suppressed instead of Displayed.

Choose Save and wait for the update to finish before closing the page.

Check: This is the action that changes the report’s public visibility. Do not stop after entering the verification code.

Step 9

Confirm that the setting was saved

Check PeopleConnect first, then test the public broker page.

Open Suppression Settings and confirm that the matching report is labeled Suppressed. Save the date or take a screenshot.

After the public index has updated, search Instant Checkmate in a private browser window so an old cached page does not mislead you.

Step 10

Handle duplicates and schedule a recheck

Older names and locations can create more than one matching report.

Return to the matching-record screen and suppress every additional result that clearly belongs to you.

Search Instant Checkmate again after several weeks. Keep the PeopleConnect email and your screenshot in case a refreshed record appears.

Common questions

Do I need a paid Instant Checkmate account?

No. PeopleConnect’s suppression workflow is free and does not require a paid background report.

Why am I asked for my date of birth?

PeopleConnect uses the date to distinguish your record from people with the same name. Review it carefully because the current form warns that it cannot be changed after it is saved.

What if I cannot access a listed email or phone number?

Do not use a contact method belonging to another person. Email privacy@peopleconnect.us with the record ID and ask for another verification route.

How do I know the suppression worked?

The matching report should say Suppressed in PeopleConnect’s Suppression Settings. Afterward, check the public broker site in a private browser window.

Does this remove every copy of my information online?

No. The control applies to the matching report across PeopleConnect’s people-search websites. Unrelated brokers maintain separate databases.